Open the product form
Open Inventory, the product list and a new product
Why this step
Open Inventory from the application sidebar, open Products, switch between the kanban and list views, click New and give the product its name, favourite star and photo. Everything after this step happens on the form that opens.
What this does
Every quotation line, purchase line, stock move and cutting list in WindoorERP starts from a product record, and every product record is edited on one screen: the product form. This first topic gets you to that form the way the setup demo does: open Inventory from the application sidebar, open the product list, switch between its two views, and click New. The topics that follow explain the form itself, region by region and tab by tab.
Before you start
- Inventory user rights to browse; the product form is editable by Inventory, Sales and Purchase users, and by administrators.
- Search the list before you click New. A second record for the same profile splits its stock and its cost history across two products, and nothing warns you.
- Have the product name and a photo ready. The photo is optional, but the kanban view and the quotation are far easier to read with one.
Steps
-
01
Open the Inventory app from the application sidebar down the side of the window: click its icon, or press Ctrl+Shift+B to widen the sidebar into a list with a search box, type the app name and pick it. Press the shortcut again to shrink the sidebar back to icons when you no longer need it.
-
02
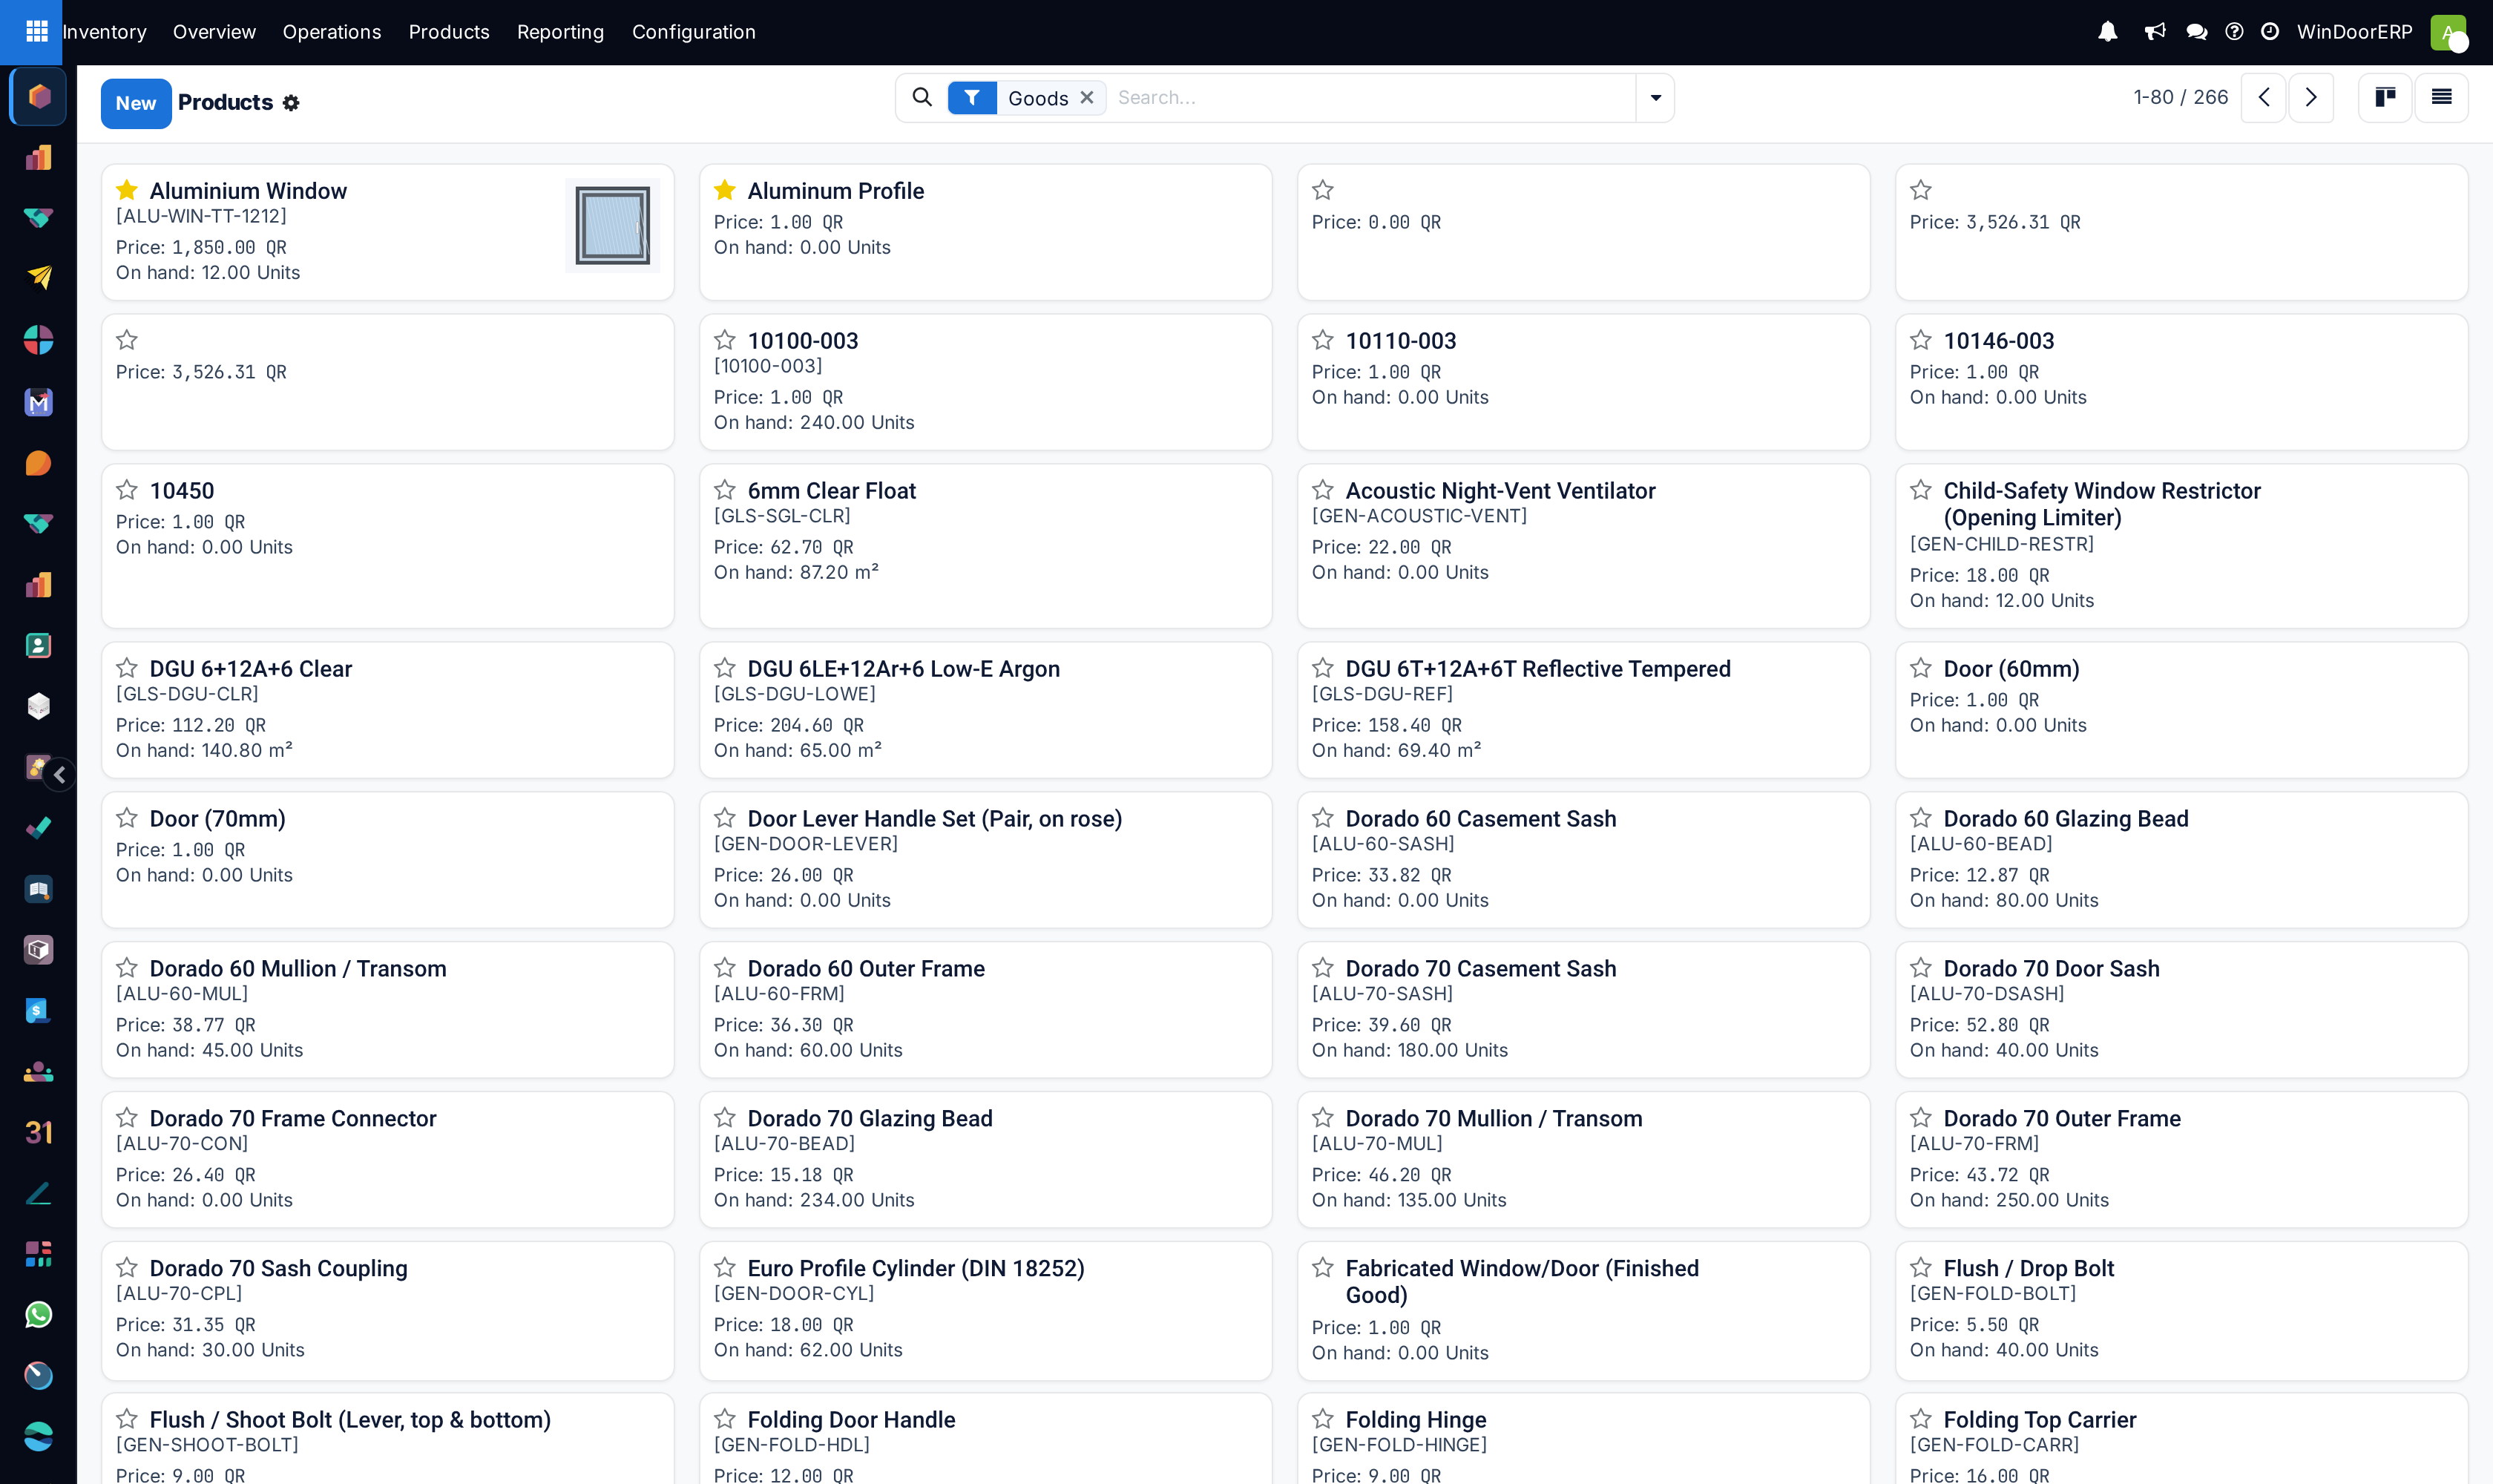
Open Products › Products. The list opens as cards; the two icons at the top right switch between the kanban and list views, and the breadcrumb takes you back to this list from any product you open.
-
03
Click New. The empty product form opens with the name field focused.
-
04
Type the product Name, for example Aluminium Window, click the star to make it a Favorite, and click the camera placeholder to upload a product photo.
-
05
Tick Sales, Purchase, or both, and save. The next topic explains the header and the row of smart buttons that appear above the form.
The two views of the product list
The kanban view shows one card per product with its image, name, internal reference, sales price and, for tracked goods, the quantity on hand. It is the view to use when you recognise products by their picture.
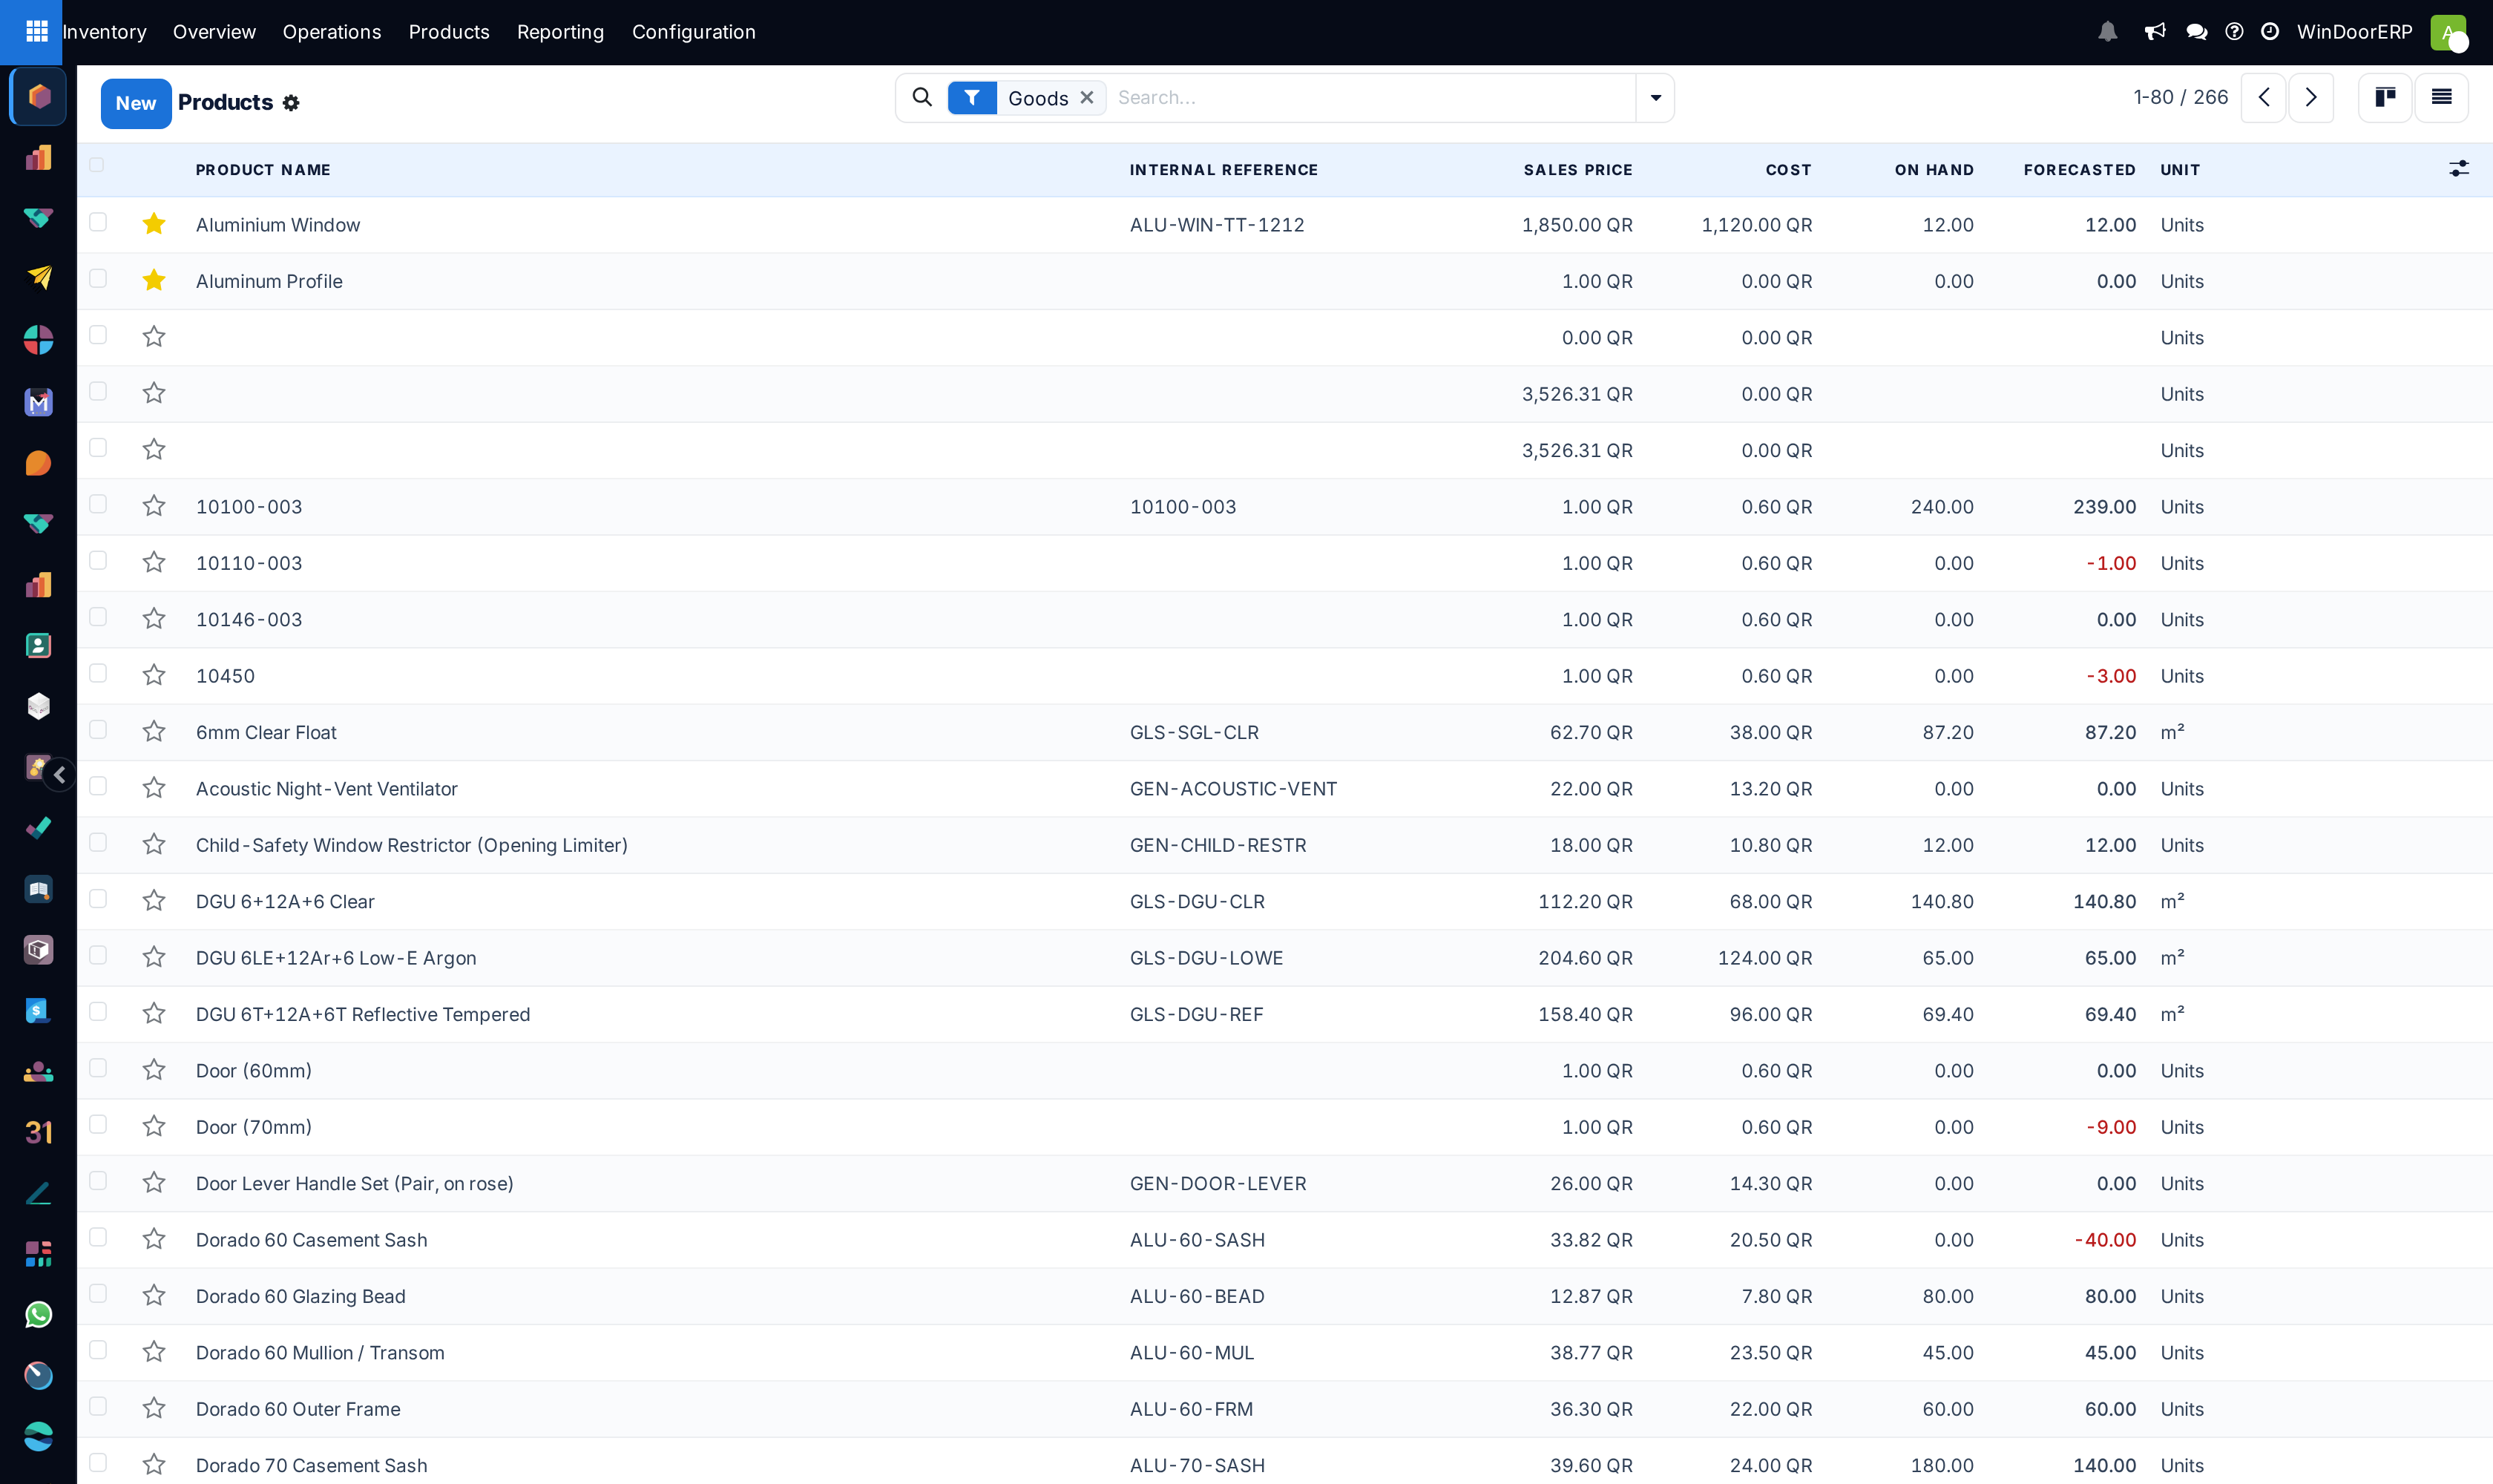
The list view is the working view. Its columns, and the ones hidden behind the column picker at the end of the header row, are these.
| Column | What it shows |
|---|---|
| Favorite (star) | The favourite flag; click it in the list to toggle it without opening the product. |
| Product Name | The name, with the internal reference in brackets when one is set. |
| Internal Reference | Your own code for the product. |
| Sales Price | The list price; greyed out when the product is not sold. |
| Cost | The cost price, read-only in the list. |
| On Hand and Forecasted | Stock quantities, only for goods with Track Inventory on; red when negative, with totals at the foot of the column. |
| Unit | The unit of measure the quantities are counted in. |
| Hidden by default: Responsible, Tags, Barcode, Company, Product Category, Product Type | Switch them on from the column picker when you need to sort or group by them. |
The same product list is reachable from Sales › Products › Products and Purchase › Products › Products. They are the same records; Purchase simply opens the list filtered to products that can be purchased.
Troubleshooting
The product is missing from the quotation product search but exists in Inventory: Sales is not ticked on its header. Purchase orders behave the same way with the Purchase box.
You cannot find the product by its code: the search box matches the name and the internal reference, and the reference is only set on the General Information tab. A product with no reference is only found by name.
The list shows no On Hand column for a product: it is a service, a combo, or goods without Track Inventory.
Common mistakes
- Creating the product before searching for it, and ending up with two records for one profile.
- Naming products by supplier code alone. The name is what people search for; put the code in Internal Reference where it belongs.
- Skipping the photo on window and door products. The card, the quotation and the customer portal all show it.
Checkpoint
A product named the way the workshop says it exists, with a photo, and the empty product form is in front of you.