Choose glass for an opening
What this does
Sets what actually fills each opening — the specification that drives cost, weight, hardware and lead time more than any other choice in the design.
Before you start
- The line needs a saved design; glass is chosen inside the designer, panel by panel.
- Know the specification the drawings call for. On this system you pick a named glass build from a catalogue, not a set of loose properties.
Steps
-
01
Open the design from the quotation line.
-
02
Select the panel you want to specify — each sash and each fixed light is its own panel.
-
03
Choose the glass build for it from the catalogue: a named specification such as 24mm Low-E Double Glass (6LE+12Ar+6), which carries its own type, thickness, coating and U-value.
-
04
Repeat for every panel that differs.
-
05
Save. The analysis re-runs and the glass areas and price follow.
The glass catalogue
The builds you can choose are maintained centrally under System › Profiles & Glass › Glass, so every quotation prices the same specification the same way. Each record carries its Type — Single Glazed, Double Glazed, Triple Glazed, Laminated, Tempered — its Thickness, its U-Value, and a Safety Rating such as Safety Glass, Security Glass or Fire Rated.
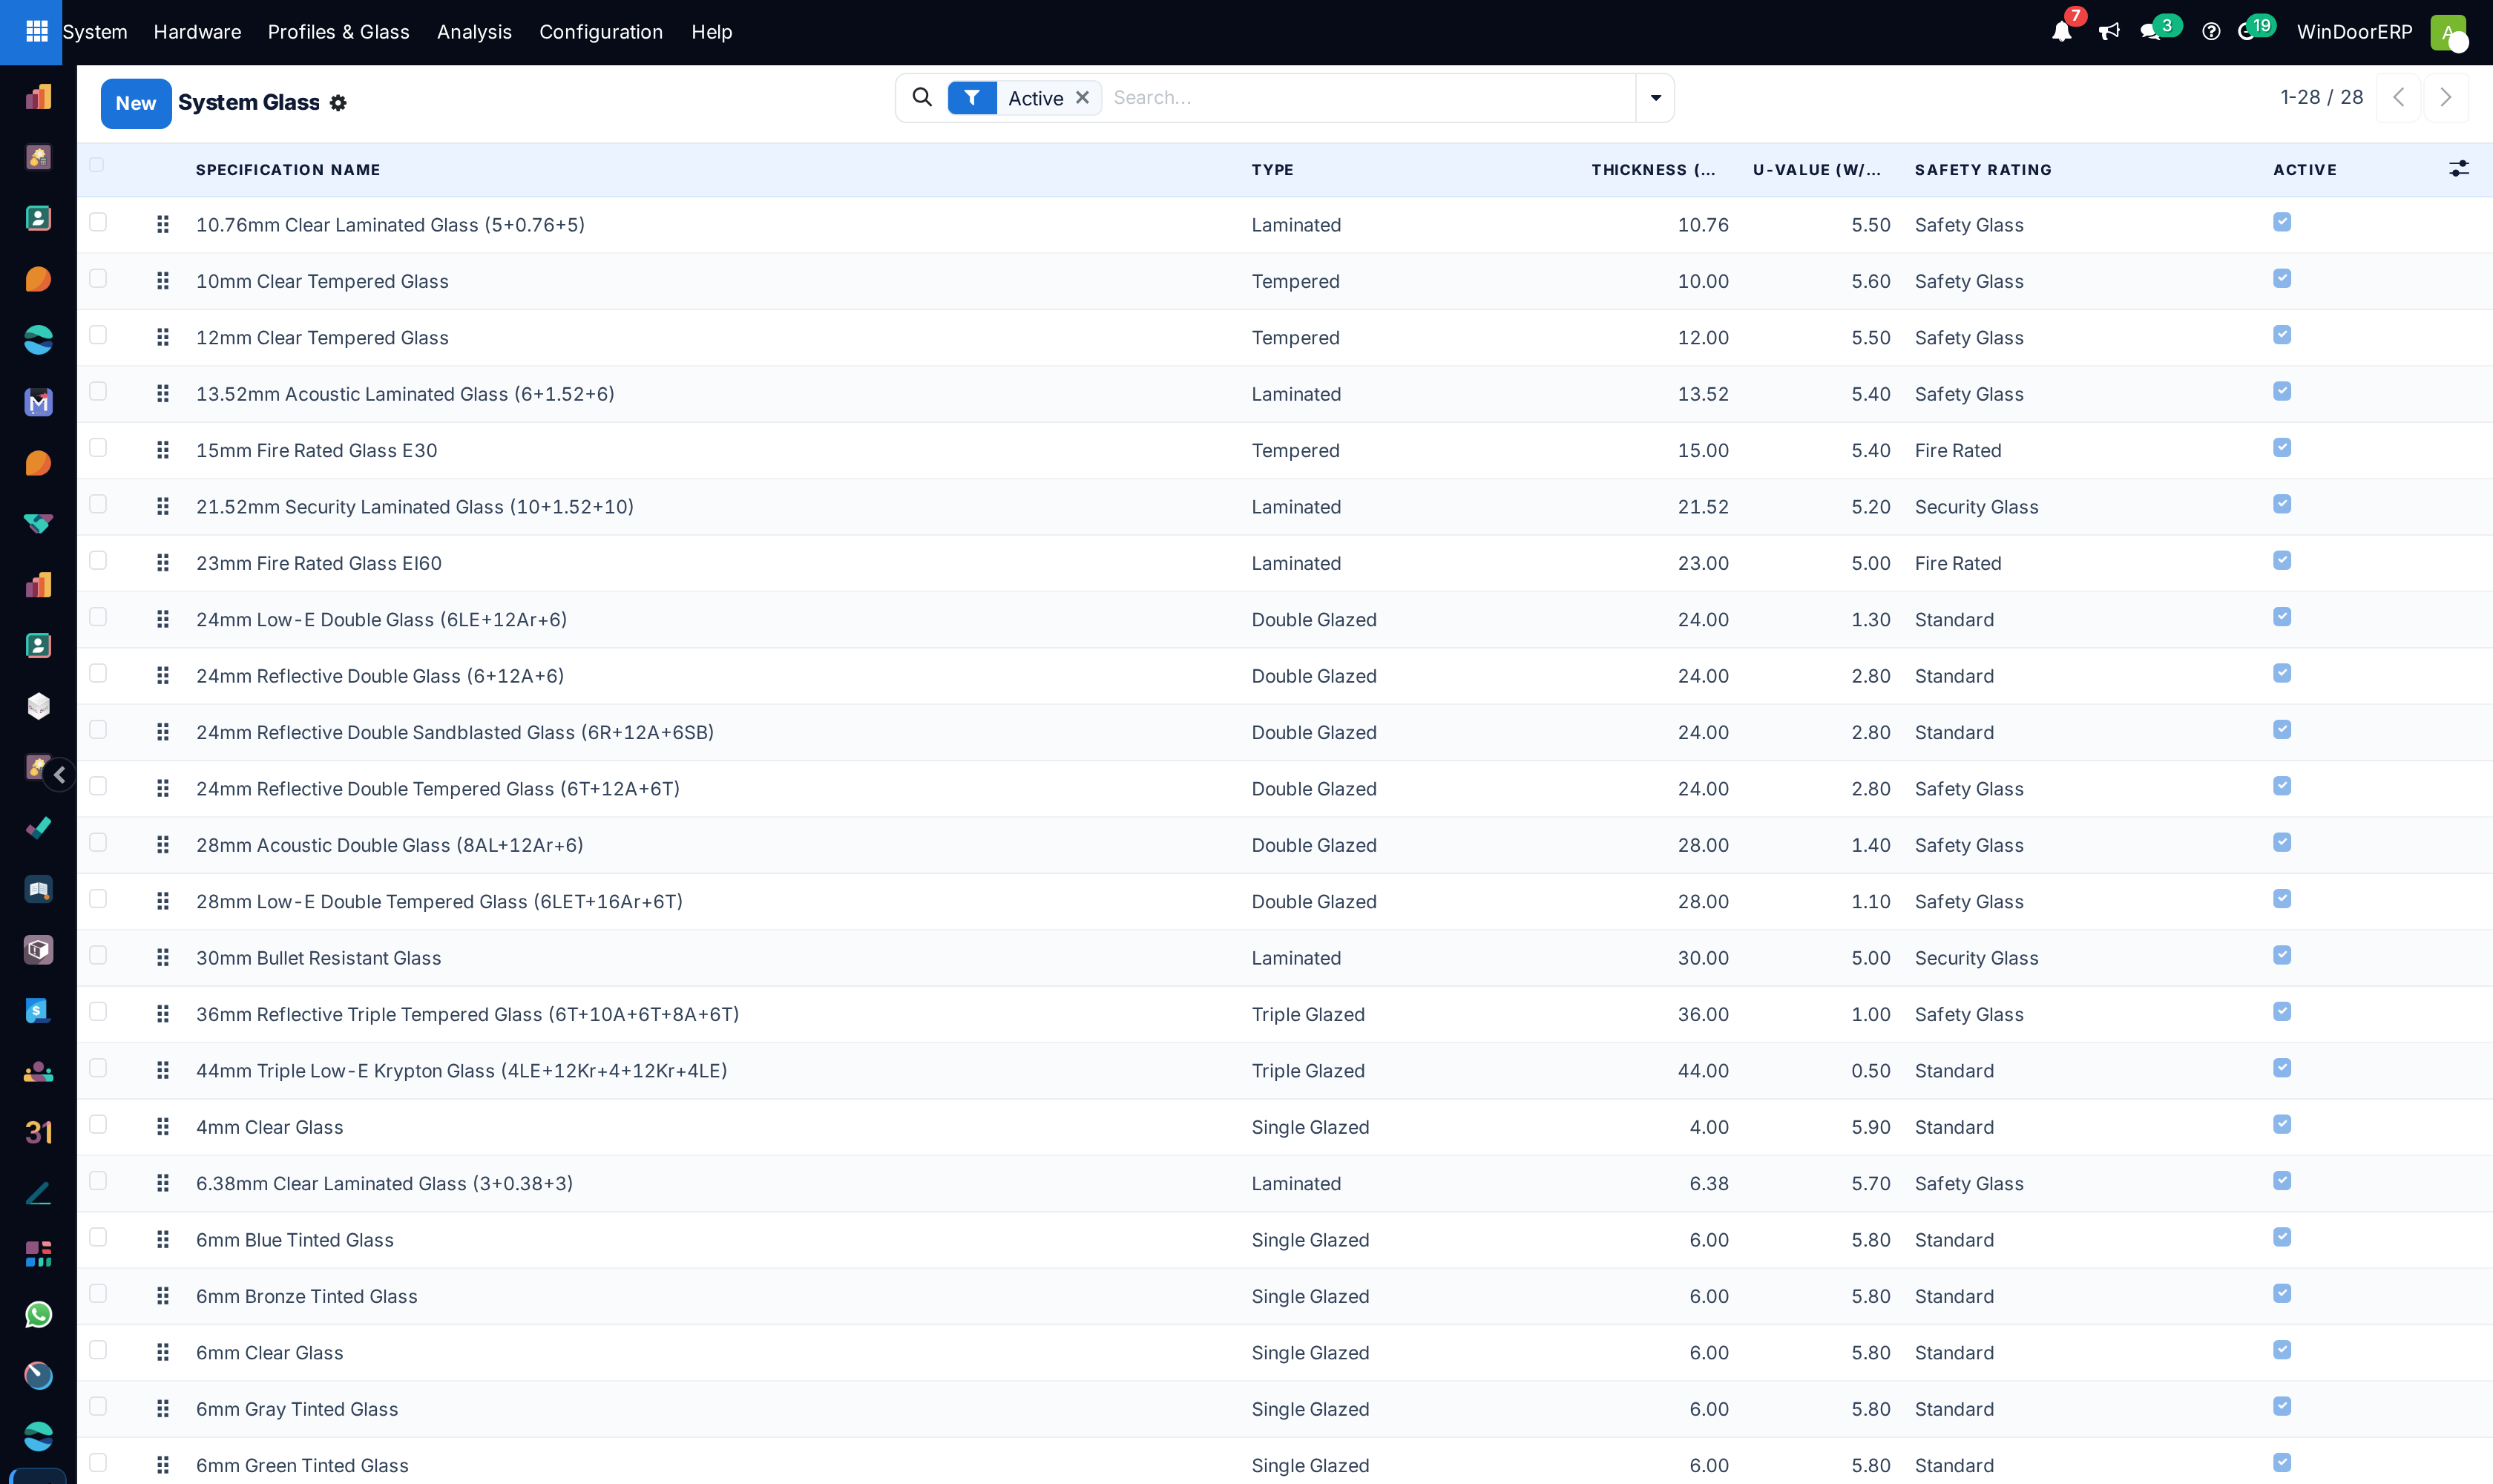
Because the properties belong to the catalogue record, you specify a panel by choosing the right build — not by typing a thickness and a coating onto the panel. If the specification you need is missing, it belongs in the catalogue first.
What the choice changes downstream
- Glass area — every panel becomes a glass-panel line in the analysis with its own spec, thickness and area, and they sum into Total Glass (m²), which drives both the glass order and much of the price.
- Cutting data — each panel keeps its true shape, so shaped and arched panels are cut to the drawing rather than to a rectangle.
- Hardware — heavier and larger sashes take different hardware; the accessories rules pick it from the sash's dimensions and the rules configured for the series.
- Lead time — laminated, coated and fire-rated builds are rarely stock items. The difference usually shows up as a late job rather than as a warning.
Example
A villa's ground-floor sliders are drawn with 6 mm clear. Re-specified as 24mm Low-E Double Glass, the same design gains weight and thickness per sash — the glass area is unchanged, but the cost, the U-value on the submittal and the hardware the rules select all move with it.
Troubleshooting
| Symptom | Cause and fix |
|---|---|
| A panel came out with the wrong specification | Panels are specified individually — one was left on the default. Select it in the designer and set its build, then save. |
| The price did not move after changing the glass | The change was not saved, so no new analysis ran. Save in the designer and check the analysis version. |
| The build you need is not in the list | It does not exist in the glass catalogue yet. It has to be added under System › Profiles & Glass › Glass before any design can use it. |
| The line's glass name does not match every panel | The line shows the first panel's glass as a summary. The per-panel truth is in the analysis, on the glass-panel component lines. |
Common mistakes
- Specifying glass on one panel and assuming the rest inherited it. Panels are specified individually on purpose.
- Changing the glass and not saving, so the quoted price is for the old build-up.
- Reading the line's glass name as the whole story on a mixed design.
- Agreeing a delivery date on a coated or laminated unit without checking whether it is a stocked build.
Was this article helpful?
Thanks — your feedback helps.
Running a window or door factory?
Ask for a demo