Design it right
Fix the dimensions and sashes
Why this step
Approved job, real sizes. What you set here becomes cut lengths on the saw.
What this does
Sets the frame size and divides it into sashes and fixed lights. Every cut length, every piece of glass and every hardware set downstream is derived from these numbers.
The drawing is the specification. What you draw here is what gets cut, so the numbers must be the ones the fabricator should work to — not the ones the site tape measure gave you.
Before you start
- Know whether your figures are the structural opening or the finished frame. The designer works in frame sizes.
- Agree the clearance your installers expect around the frame, and deduct it consistently. A rule applied differently by two estimators produces two different factories' worth of rework.
- Have the profile system chosen first — sash sizes are derived from its geometry.
Steps
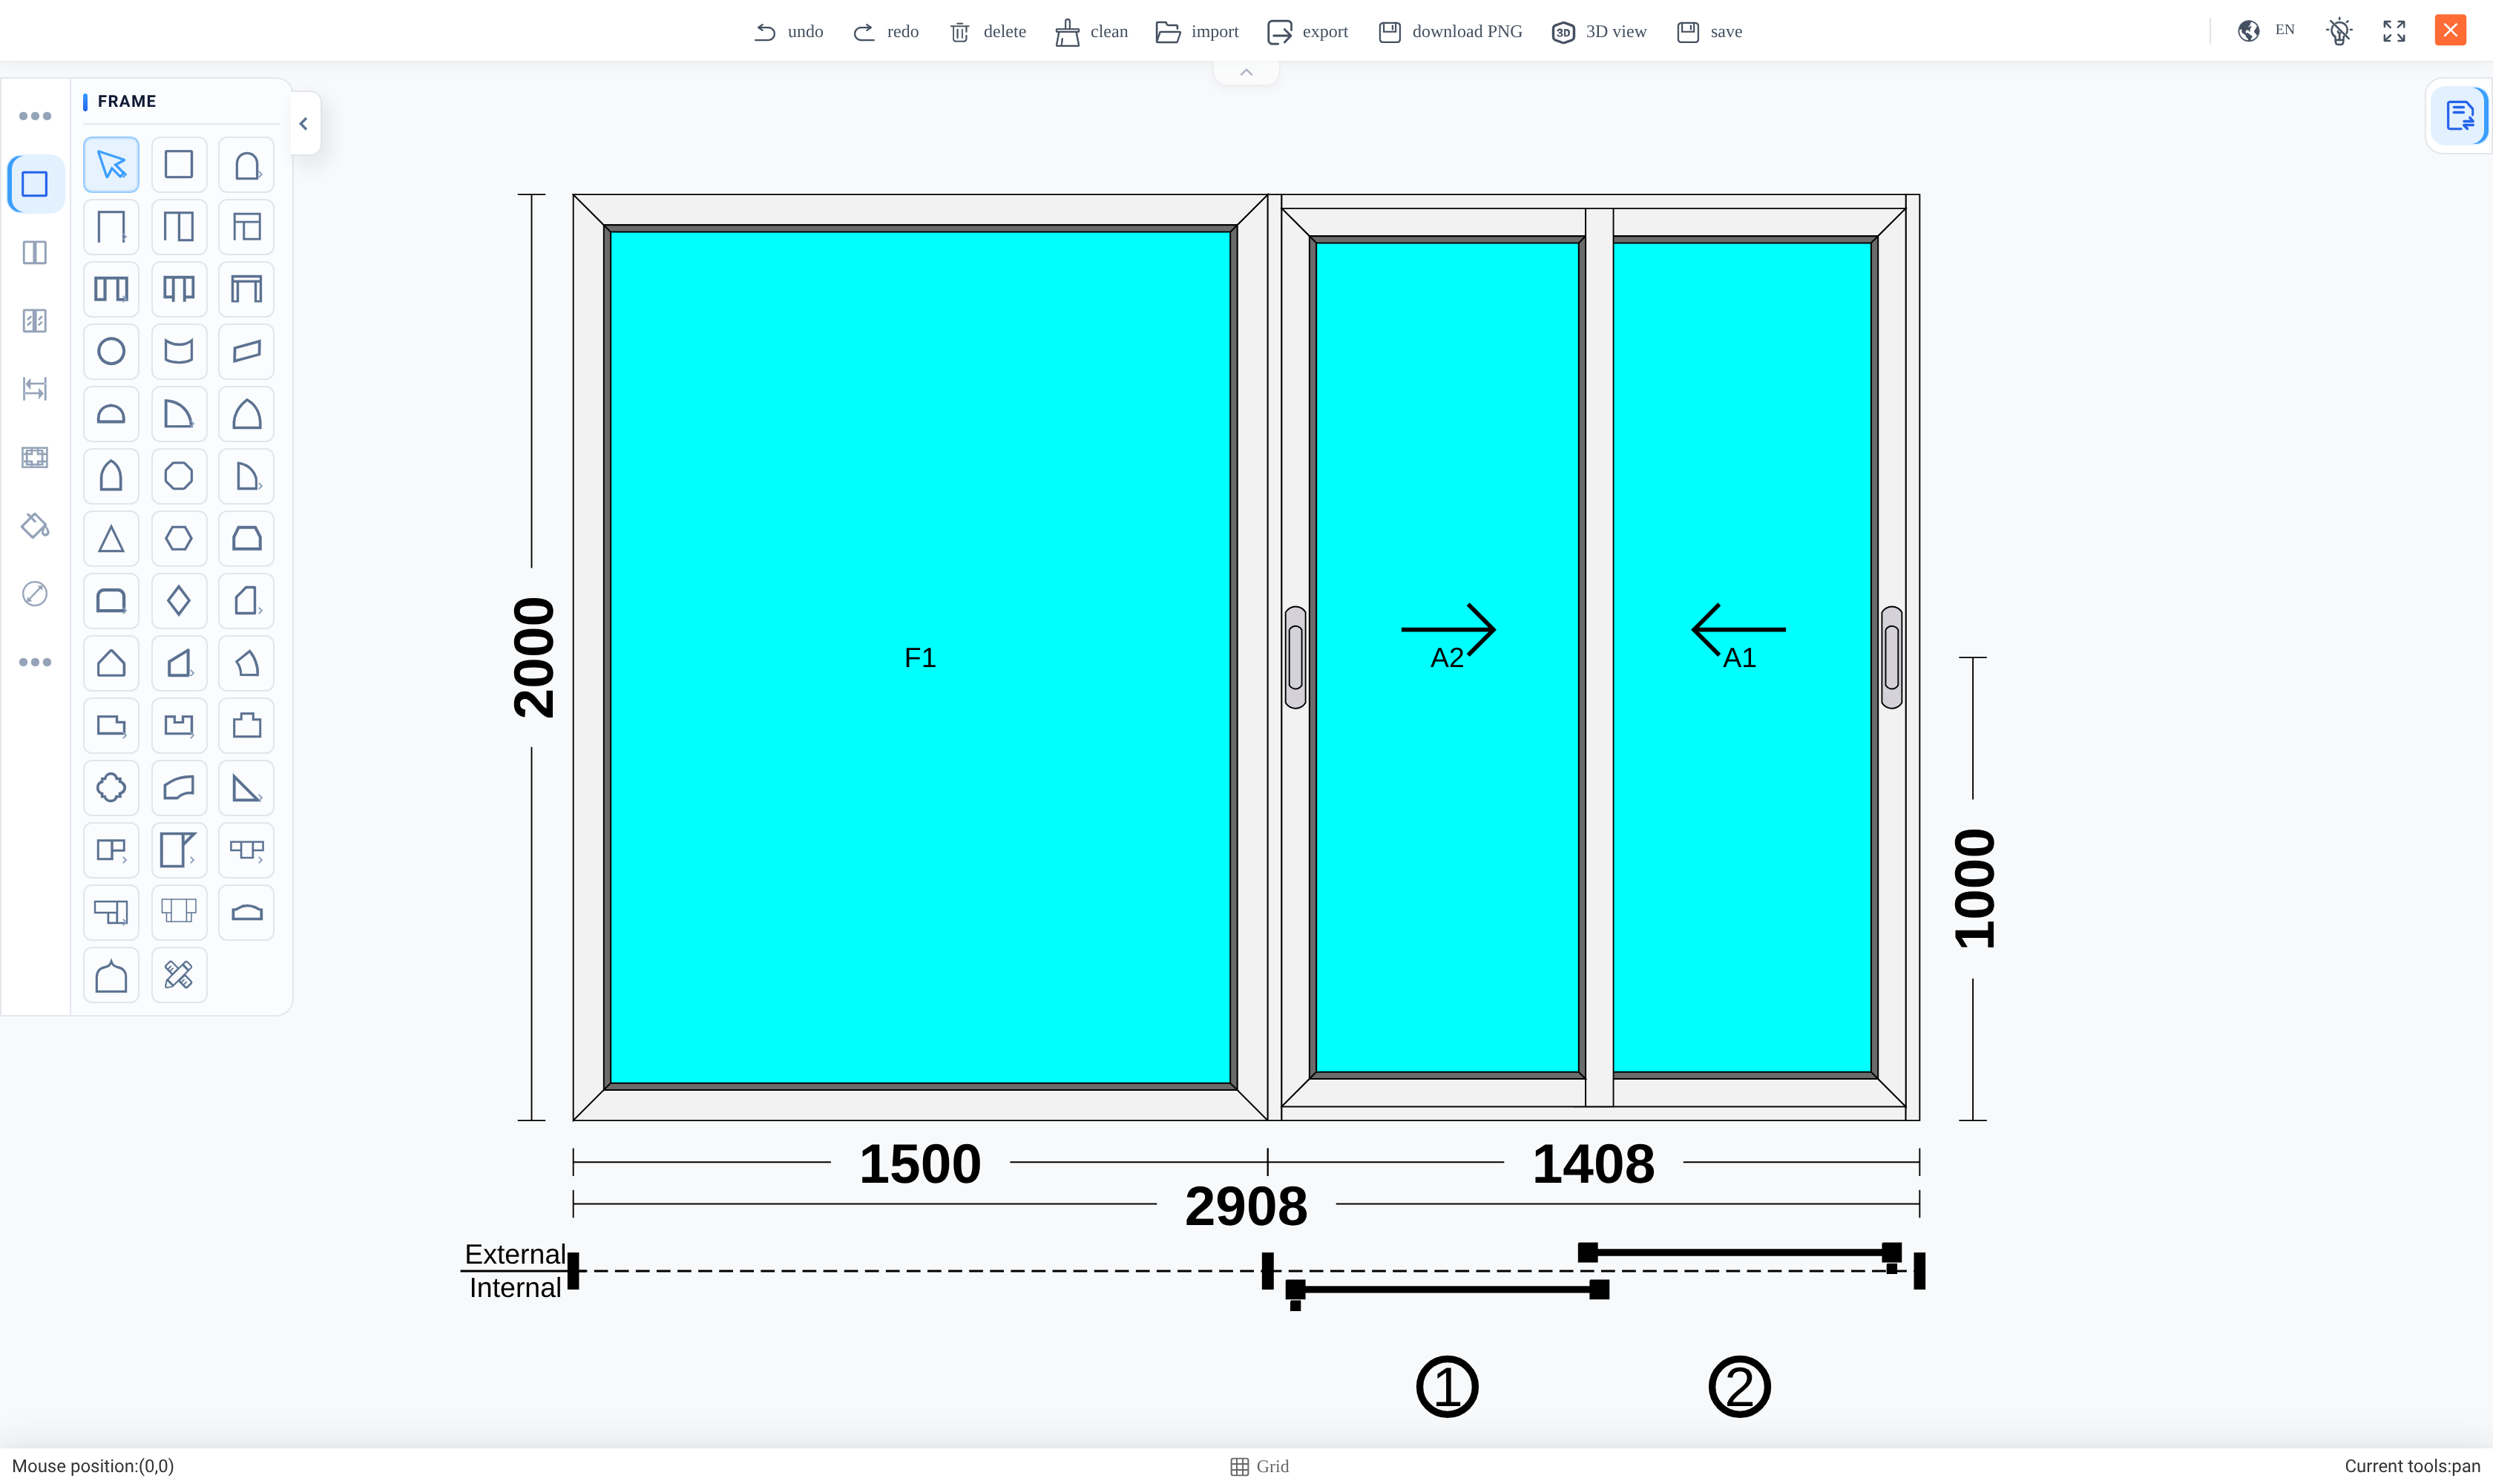
-
01
Open the design from the quotation line.
-
02
Enter the overall frame width and height in millimetres.
-
03
Split the frame: add vertical or horizontal divisions to create the panel layout.
-
04
Set each panel's role — a fixed light, or an opening sash.
-
05
For each sash, set how it opens and which way it is handed.
-
06
Save, then run the design analysis and read the derived sizes back.
Reading the drawing
| Overall dimensions | The outer chain — the finished frame size. This is what is manufactured to. |
|---|---|
| Panel dimensions | The inner chain, one figure per division, showing how the overall width is shared out. |
| Panel labels | Each panel is labelled by role — a fixed light and opening sashes are marked differently, with an arrow showing the opening direction. |
| Sash numbering | Circled numbers beneath the frame identify each opening panel, and are what the shop paperwork refers to. |
| External / Internal | Which face you are looking at. Handing is meaningless without it, and reading it backwards is the classic way to fit a door that opens the wrong way. |
What the numbers drive
A sash is not a number you type — it is derived. The sash width comes from the panel width less the frame faces the profile system defines; the glass comes from the sash less the bead rebate.
So a frame width and a division position are the only real inputs. Everything else — sash sizes, glass sizes, cut lengths, the hardware chosen for each sash — follows from them and from the profile system.
That is also why the analysis is worth reading rather than trusting. If a sash size looks wrong, the input to check is the division and the system geometry, not the sash.
Getting the sizes right
Work in finished frame sizes and deduct clearance once, by an agreed rule. Two estimators deducting differently is the most common cause of units that do not fit.
Watch the maximum sash size and weight the system allows. A panel that exceeds them may still draw, and will be a problem in the workshop rather than on the screen.
Divide before you detail. Adding a division after handing and hardware are set re-derives everything to its right.
Troubleshooting
| Sash sizes are not what I expected | They are derived from the panel width and the system's face widths. Check the division position and the profile system. |
|---|---|
| The unit does not fit the opening | Frame size versus structural opening. Confirm which figure was entered and what clearance was deducted. |
| A door opens the wrong way | Handing was read against the wrong face. Check the external/internal indicator on the drawing. |
| The panels do not add up to the overall width | The mullions take width too. The panel chain and the overall chain differ by the mullion sections. |
| A sash is too big to make | It exceeds the system's maximum sash size or weight. Split the panel or change the system. |
| The analysis did not change after an edit | Save the design and re-run it; the analysis is a snapshot, not a live view. |
Common mistakes
- Entering the structural opening as the frame size.
- Deducting clearance inconsistently between estimators.
- Typing a sash size and expecting the frame to follow. The derivation runs the other way.
- Setting handing without checking which face the drawing shows.
- Adding a division after the hardware is set and not re-checking what changed.
Checkpoint
The drawing matches the opening you were asked for, and the cut lengths are calculated rather than typed.